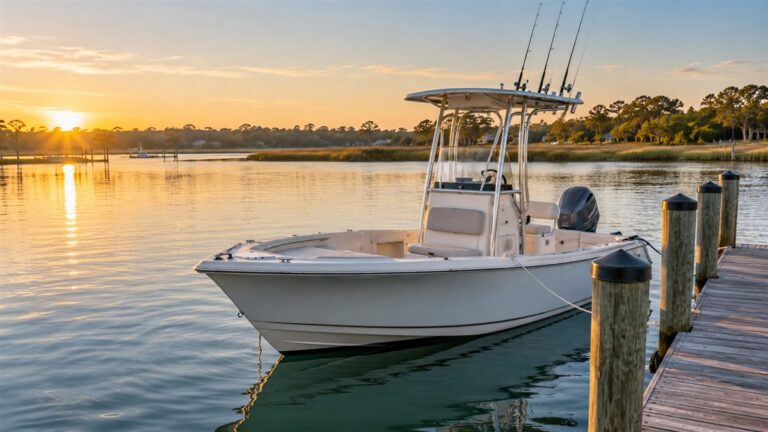
Inshore saltwater fishing gets complicated fast if you start by buying gear for every species, every tide, and every type of structure. A better first system is one versatile spinning outfit, a small set of terminal tackle, a landing net and measuring tool, and a plan for moving with the tide.
Visit the Wave Angler home page for more beginner-friendly coastal fishing resources and trip-planning tools.
For most beginners fishing North Carolina and the Southeast, a strong baseline is a 7- to 7-foot-6-inch medium-power spinning rod, a 2500- to 3000-size spinning reel, 10- to 15-pound braided main line, and roughly 15- to 25-pound monofilament or fluorocarbon leader.
That setup can handle soft plastics, popping corks, live shrimp, small topwaters, jigheads, and many of the redfish, speckled trout, flounder, black drum, and other fish you will encounter in creeks, sounds, marshes, docks, and the Intracoastal Waterway.
The important part is not the exact number on the reel or line spool. It is matching your tackle to lure weight, current, cover, target fish, and how you plan to fish.
Around open grass or a clean flat, lighter tackle is an advantage. Around oysters, dock pilings, bridge structure, or hard current, step up the rod, leader, and sometimes the main line.
The Simple Beginner Inshore Saltwater Fishing Setup
- Primary rod: 7 to 7’6″, medium or medium-light, fast or moderate-fast spinning rod.
- Primary reel: 2500- to 3000-size spinning reel with a smooth drag.
- Main line: 10- to 15-pound braid for open water; 20-pound braid is reasonable around heavier structure.
- Leader: 15- to 25-pound mono or fluorocarbon for general use; increase abrasion resistance around oysters, pilings, or larger fish.
- Second outfit: 7-foot medium baitcasting rod with a low-profile baitcaster once you want more casting accuracy around structure.
- Core terminal tackle: jigheads, weedless hooks, circle hooks for natural bait when appropriate, popping corks, swivels, small egg weights, and leader material.
- Landing and legal gear: knotless or coated landing net, pliers, line cutters, and a ruler or measuring board long enough for the fish you may legally retain.
You do not need every product in this guide. The product examples are here to show sensible choices at different price points and for different jobs. Learn the system first, then buy only the equipment that solves a problem you actually have.
Start with spinning gear
If you only own one inshore outfit, make it a spinning setup. Spinning gear handles light jigheads, small soft plastics, popping corks, live bait, and windy conditions with less frustration than a baitcaster. It is also easier to hand to a new angler without spending half the trip clearing backlashes.
A 2500- or 3000-size reel is the useful center of the range. Reel sizes are not standardized between manufacturers, so compare line capacity, reel weight, drag, and how the reel balances on the rod rather than buying solely by the number printed on the body.
Spinning reels worth comparing
Daiwa BG 3000: a practical value-oriented baseline for a general inshore setup. It is not the lightest reel in the category, but it is a useful reference point for what a durable 3000-size reel should feel like.
Shimano Stradic C3000XG FM: a lighter, more refined step-up option for anglers who cast artificials for hours and care about reducing overall outfit weight.
Daiwa Saltist MQ: a saltwater-focused upgrade to consider if your reel regularly lives around spray and hard saltwater use.
PENN Battle IV 3000 Combo: a straightforward option for someone who would rather buy a matched spinning outfit than select the rod and reel separately.
Spinning rods: choose the action before the logo
For a first inshore rod, a 7- to 7’6″ medium rod is difficult to beat. Medium-light is excellent for small jigheads, trout, and open flats. Medium gives you a broader range for redfish, flounder, popping corks, and general-purpose artificials. Medium-heavy becomes useful when you consistently fish heavier lures, stronger current, or hard structure.
Two concrete current examples are the PENN Squadron IV Inshore Spinning Rod and the Ugly Stik Carbon Inshore Spinning Rod. The PENN is a useful lighter inshore example; the Ugly Stik Carbon is a straightforward medium-class option. In either case, buy the specific power and lure rating that matches what you expect to throw most often.
If your normal lure is a 1/8- to 1/4-ounce jighead with a small paddletail, a rod designed for much heavier weights will feel dead and cast poorly. If you regularly throw a cork, live bait, and added weight, a very light rod may be overloaded.
The lure rating printed on the rod is more useful than a generic power label.
When a baitcaster makes sense inshore
A baitcaster is not necessary to catch inshore fish. It becomes useful when you repeatedly cast medium-weight lures at docks, oyster points, grass edges, laydowns, or other targets where accuracy matters more than maximum forgiveness.
For most beginners, buy the spinning outfit first and the baitcaster second. A low-profile baitcaster generally asks more of the angler in a headwind and with very light lures, but it can be extremely efficient for repeated casts around structure.
Baitcasting reels worth comparing
Shimano SLX XT A: a sensible place to start if you want adjustable braking without jumping immediately to a premium reel.
Daiwa Tatula 100: a compact alternative for anglers who prefer Daiwa’s casting-control system and want a general-purpose low-profile reel.
For a baitcasting rod, the Ugly Stik Carbon Inshore Casting Rod is a concrete current example. Around a 7-foot medium casting rod is a useful all-around starting point. Move to medium-heavy only when the lure weight, current, and structure justify it.
Twenty- to 30-pound braid is a comfortable range on many inshore baitcasters because the slightly larger diameter is easy to manage on the spool and gives more margin around docks and shell. That does not mean every fish requires 30-pound line. Match the line to the cover and presentation.
Braid, monofilament, and fluorocarbon: what each one does
Line choice is easier when you stop trying to crown one material as “best.” Each material solves a different problem.
Braided line: the default main line for most inshore spinning setups
Braid gives you a thin diameter, strong sensitivity, low stretch, and good casting performance. For a general spinning setup, 10- to 15-pound braid is a practical starting range. Move toward 20 pounds when you spend more time near oysters, dock pilings, or other abrasive structure.
PowerPro Spectra Fiber Braided Fishing Line in 15-pound test is one established example for a general inshore spinning setup. Whatever brand you choose, fill the spool correctly and do not overfill it. Too much braid on a spinning reel is one of the easiest ways to create wind knots.
Monofilament: still useful as main line, leader, and backing
Mono stretches more than braid, is inexpensive, and is forgiving. A beginner can absolutely fish a full spool of monofilament. It is also useful as reel backing and as leader material.
Mono is especially useful with topwater plugs because its buoyancy and extra stretch can help keep the presentation high and cushion fish hooked on trebles at close range.
Berkley Trilene Big Game Monofilament is a common inexpensive mono to compare for backing, leader material, or heavier full-spool applications.
Fluorocarbon: usually most valuable as leader material
Fluorocarbon is popular for leader material because it offers useful abrasion resistance and is less visible underwater than many alternatives. For a first inshore setup, you do not need to fill the entire reel with fluorocarbon. Braid to a short fluorocarbon leader is usually simpler and more economical.
Seaguar Blue Label Fluorocarbon Leader is a familiar saltwater leader option; the linked example is 20-pound test. A 15- to 25-pound leader covers a lot of general inshore fishing, but do not treat that range as a rule.
Clear open water and small trout may justify lighter leader. Oyster shell, dock pilings, bigger drum, and toothy fish can justify heavier leader.
Inspect the last few feet after every fish and every contact with shell. A leader that looks fine from five feet away can be badly nicked near the knot or lure.
Leader knots: learn one strong connection
You do not need five braid-to-leader knots. Learn one that you can tie correctly in wind and low light. A double-uni is easy to learn and serviceable for many general setups.
The FG knot is slimmer and passes through guides well, but it takes more practice. The best knot is the one you can tie cleanly and test before casting.
After tying a leader, pull on the connection firmly. Check the tag ends and inspect the knot whenever you feel it tick through the guides differently than normal.
Hooks and terminal tackle
Carry a small assortment rather than a tackle box full of random hardware. The useful pieces are the ones that let you change presentation as the tide, depth, and bait change.
- Jighead / paddletail: a weighted hook puts a soft plastic at the depth you need. Carry several weights within your rod’s rating. If you want a ready-to-fish shortcut rather than loose heads and plastics, the TRUSCEND Shadtale pre-rigged swimbaits combine the jig hook and soft bait.
- Weedless soft-plastic option: useful over grass, shallow shell, and snag-prone cover. The TRUSCEND Duramax pre-rigged weedless saltwater lures are a simple ready-made example.
- Circle hooks: a strong default for many natural-bait presentations and required in some fisheries or methods. The Owner Mutu Light Circle Hook 4/0 Pro Pack is a concrete saltwater example; match hook size to bait and current regulations.
- Carolina-rig hardware: a sliding weight, beads/swivel, leader, and hook keep bait near bottom while letting it move. The Reaction Tackle Carolina Rig 6-Pack gives a beginner a premade starting point instead of assembling every weight and bead separately.
- Popping cork: suspends shrimp or a soft plastic above grass, shell, or uneven bottom and adds sound. The D.O.A. Deadly Combo is a premade cork-and-shrimp system that can be tied on and fished immediately.
The point of the premade examples is convenience, not that you must always buy completed rigs. Once you understand how each system works, loose hooks, weights, leaders, corks, and plastics are cheaper and easier to customize.
Four rigs cover a huge amount of inshore fishing
1. Jighead and paddletail
This is the simplest searching rig. Cast it across a creek mouth, along a grass edge, beside an oyster point, or down a dock line. Adjust jighead weight so the lure reaches the zone without plowing the bottom. In shallow water, lighter is often better. In deeper or faster water, add enough weight to maintain contact.
Ready-to-fish example: TRUSCEND Shadtale pre-rigged soft fishing lures. If you prefer to rig your own, pair a loose jighead with a paddletail such as the Z-Man MinnowZ 3-inch paddle tail.
2. Popping cork
A popping cork suspends bait or an artificial at a controlled depth. It is especially useful over grass, shell, and uneven bottom where dragging a lure would snag. Set the leader length so the bait spends most of its time above the structure rather than buried in it.
Premade example: D.O.A. Deadly Combo popping cork and shrimp, which gives a beginner the cork and shrimp presentation in one ready-to-rig package.
3. Carolina-style live-bait rig
An egg sinker above a swivel with a leader and hook lets a live or dead bait work near bottom. Use the lightest weight that maintains the depth you need. Too much weight makes a bait look unnatural and increases hang-ups around shell.
Premade example: Reaction Tackle Carolina Rig 6-Pack. It is useful as a visual starting point even if you later build your own with different leader, hook, or weight sizes.
4. Free-lined bait
When current and depth allow it, a live shrimp or baitfish with little or no added weight can be extremely natural. This is useful around current seams, docks, and shallow edges when the bait will stay in the strike zone on its own.
For natural bait, a circle-hook option such as the Owner Mutu Light Circle Hooks is worth keeping in the box when the hook style is appropriate and legal for the fishery.
Where to fish inshore as the tide changes
The tide does not create one universal “best” fishing time. It changes access, depth, current, and where bait can travel. The better question is: what habitat becomes useful at this stage of the tide?
| Tide stage | Start looking here | Why |
|---|---|---|
| Rising | Outside marsh edges, oyster edges, points, shallow flat entrances | Fish gain access to water that was too shallow at low tide. |
| High | Flooded grass lines, shoreline cover, shallow coves, docks with newly flooded structure | Maximum access, but fish can spread out. |
| Falling | Drains, creek mouths, cuts, oyster points, channel edges | Water and forage leave the shallows through predictable exits. |
| Low | Creek bends, deeper holes, ICW edges, bridge/dock structure with depth, ends of bars | Shallow habitat empties and fish concentrate along remaining depth. |
Rising tide: follow access into the shallows
Early in a rising tide, start on the outside edge of a flat, marsh, or oyster area. As depth increases, fish can move onto habitat that was unreachable an hour earlier. Look for points, small depressions, shell edges, and seams where moving water meets slower water.
Do not race straight to the shallowest bank. Work your way in with the water. A redfish, trout, or flounder may be sitting on the first useful depth change before the bank itself becomes productive.
High tide: target irregularities in flooded cover
High water can open miles of shoreline, grass, and flooded cover. That access is useful, but it can spread fish out. Instead of fishing every foot of bank, focus on irregularities: a point in the grass, a small drain, a dock corner, isolated shell, a cut, or a place where the bottom changes.
Quiet matters in shallow water. Do not run the boat over the area you intend to fish. Use the trolling motor, drift, push pole, or a controlled approach when practical.
Falling tide: drains and creek mouths become high-percentage water
As water leaves the marsh and shallow flats, it has to go somewhere. Small drains, creek mouths, cuts, and the downstream sides of points funnel water and forage toward deeper channels.
Position so your lure or bait travels naturally with the flow. Fish the seam, the slower pocket beside the current, and the first depth change outside the mouth. The strongest current is not always where the fish sit; predators often hold just off the main flow where they can intercept food without fighting the hardest water.
Low tide: fish depth and learn the bottom
Low water is one of the best times to learn an area. Oyster bars, small channels, bars, drains, and depressions become visible. Take mental notes or lawful waypoints so you understand where the structure will be after the water returns.
Fish deeper creek bends, holes, channel edges, and structure that still has enough water. Be conservative in unfamiliar creeks. A productive falling-tide spot is not worth getting stranded behind a shallow bar.
Wind can override the tide table
A tide prediction is an astronomical forecast, not a guarantee of the exact water level at your boat. Wind can push water into or out of an estuary, and recent rainfall can change current and water clarity.
If the table says the water should be rising but the shoreline looks stagnant or lower than expected, trust what the water is actually doing.
Use Wave Angler to compare tide stage, wind, marine conditions, and daylight before you launch. Then confirm the actual water movement when you arrive.
Read inshore habitat, not just a map pin
Marsh creeks and grass edges
Creeks are travel lanes between shallow feeding water and deeper estuary water. Bends, mouths, small drains, and points become more or less valuable as the water moves. Fish the feature that combines current, depth, and food.
Oyster bars and shell banks
Oyster shell creates hard structure and current breaks, but it also destroys leader material. Fish the edge instead of dragging every presentation directly through the sharpest shell. Increase abrasion resistance if you are consistently rubbing structure.
Docks and pilings
Docks combine shade, vertical cover, current breaks, and often depth. Cast to the up-current side and let the presentation move naturally past the structure. Use enough tackle to turn a fish before it wraps a piling, but do not automatically jump to oversized gear.
Channel and ICW edges
Channel edges are especially useful at lower water or during strong tide. Look for places where a shallow flat or creek meets deeper water. Current seams, bends, and abrupt depth changes can concentrate bait.
Submerged grass and soft-bottom flats
Grass edges and potholes can hold bait and predators. Over submerged vegetation, a popping cork, weedless soft plastic, or lure that rides above the grass is usually more efficient than a rig that constantly fouls.
Landing nets, rulers, and handling fish
A beginner often spends more time choosing a reel than thinking about what happens after the fish is beside the boat. That is backwards if you plan to release fish cleanly or retain a legal catch.
The Frabill Conservation Series Landing Net 9510 is an example of the kind of knotless or fish-friendly landing net worth comparing. The goal is a hoop large enough for the fish you commonly catch and a handle long enough to reach the water safely from your boat, kayak, pier, or shoreline.
Keep a measuring device where you can use it immediately. The Rapala 36-inch Adhesive Fish Ruler is a simple boat-friendly example. A rigid bump board is another good choice. Whichever you use, make sure it is long enough for the species you target and that you understand the required measurement method.
North Carolina does not use one measurement method for every fish. The current Division of Marine Fisheries rules page defines total length, fork length, lower-jaw fork length, and curved fork length. Measure the fish according to the rule for that species, not according to habit.
For hook removal and line work, the TRUSCEND Lockable Fishing Pliers are a budget-oriented dedicated fishing-plier option, while the Leatherman Wave+ is a broader multi-tool. A dedicated pair of corrosion-resistant pliers is usually faster around hooks; a multi-tool earns its space by doing more jobs on the boat.
Check North Carolina fishing rules before every trip
Do not use an old screenshot, Facebook comment, or evergreen article as your source for whether a fish is legal to keep. North Carolina seasons, size limits, bag limits, and proclamations can change.
Check the current North Carolina Division of Marine Fisheries recreational size and bag limits here.
That page also explains how fish should be measured and links to current proclamations. As of this draft, the state’s current general recreational guide is effective September 2, 2026, and the page explicitly warns that fishery rules are subject to change. Check it again before the trip, especially for species with seasonal openings or proclamation-driven rules.
Also verify that you have the correct Coastal Recreational Fishing License or other required license for the water you are fishing. Rules can differ between coastal, joint, inland, state, and federal waters.
A practical first inshore tackle box
Keep the first box small enough that you know what is in it. Each item below has a job and a concrete product example so a beginner can see what to buy without guessing what a generic tackle term means.
- Tackle tray: a divided box keeps hooks, weights, corks, and small lures from becoming one pile. Example: Plano ProLatch 3700 StowAway.
- Jighead / pre-rigged jig option: use this for paddletails and other soft plastics when you need to search water at a controlled depth. Ready-to-fish example: TRUSCEND Shadtale pre-rigged swimbaits.
- Weedless soft-plastic option: use it through grass, shallow shell, and snag-prone cover. Example: TRUSCEND Duramax pre-rigged weedless saltwater lures.
- Circle hooks: use with natural bait when the presentation and regulations call for them. Example: Owner Mutu Light Circle Hooks 4/0 Pro Pack.
- Carolina-rig hardware: puts a sliding weight ahead of the leader so bait can move near bottom. Premade example: Reaction Tackle Carolina Rig 6-Pack.
- Popping cork: suspends shrimp or a lure over grass and shell while adding sound. Premade example: D.O.A. Deadly Combo popping cork and shrimp.
- Paddletail: a baitfish-shaped soft plastic for jigheads or weedless hooks. Example: Z-Man MinnowZ 3-inch paddle tail.
- Shrimp imitation: useful under a cork, on a jighead, or worked around grass and docks. Example: Berkley Gulp! Shrimp saltwater soft bait.
- Topwater plug: a surface lure for low-light periods, active bait, and shallow fish. Example: Heddon Super Spook Jr.
- Fluorocarbon leader: ties between braid and the lure or hook for abrasion resistance and a cleaner terminal connection. Example: Seaguar Blue Label 20-pound fluorocarbon leader.
- Braided main line: low-stretch line for sensitivity and strong casting performance. Example: PowerPro Spectra 15-pound braid.
- Monofilament: inexpensive, stretchy line useful for backing, leaders, topwater applications, or a full spool. Example: Berkley Trilene Big Game 20-pound mono.
- Pliers and cutters: remove hooks, cut line, and crimp or handle terminal tackle. Example: TRUSCEND Lockable Fishing Pliers.
This is enough variety to solve most beginner inshore rigging problems without turning the boat into a mobile tackle shop.
Products referenced in this guide
Every product below is linked to the exact Amazon product ID used by Wave Angler. You do not need all of them; use the list as a quick buying index for the gear discussed above.
- Daiwa BG 3000 spinning reel
- Shimano Stradic C3000XG FM spinning reel
- Daiwa Saltist MQ spinning reel
- PENN Battle IV 3000 Combo
- PENN Squadron IV Inshore Spinning Rod
- Ugly Stik Carbon Inshore Spinning Rod
- Shimano SLX XT A baitcasting reel
- Daiwa Tatula 100 baitcasting reel
- Ugly Stik Carbon Inshore Casting Rod
- PowerPro Spectra Fiber Braided Fishing Line 15 lb
- Berkley Trilene Big Game Monofilament 20 lb
- Seaguar Blue Label Fluorocarbon Leader 20 lb
- Owner Mutu Light Circle Hooks 4/0 Pro Pack
- Frabill Conservation Series Landing Net 9510
- Rapala 36-inch Adhesive Fish Ruler
- TRUSCEND Lockable Fishing Pliers
- Leatherman Wave+
- D.O.A. Deadly Combo popping cork and shrimp
- Reaction Tackle Carolina Rig 6-Pack
- TRUSCEND Shadtale pre-rigged soft fishing lures
- TRUSCEND Duramax pre-rigged weedless saltwater lures
- Z-Man MinnowZ 3-inch paddle tail
- Berkley Gulp! Shrimp saltwater soft bait
- Heddon Super Spook Jr topwater lure
- Plano ProLatch 3700 StowAway tackle tray
What I would buy first
If starting from zero, buy in this order:
- One balanced spinning outfit. Around a 7-foot medium rod, 2500- or 3000-size reel, 10- to 15-pound braid, and leader material.
- A small terminal-tackle kit. Jigheads, a few weedless hooks, circle hooks, popping corks, swivels, and egg sinkers.
- Landing and legal-measurement gear. Net, ruler or bump board, pliers, and cutters.
- A focused lure and bait selection. Paddletail, shrimp profile, topwater, and whatever fresh/live bait is legal and productive locally.
- A baitcaster only after you know why you want it. Add it for casting accuracy and efficient repetitive work around structure, not because inshore fishing requires one.
First-trip checklist
- Check the current North Carolina license requirements, size limits, bag limits, seasons, and proclamations.
- Check wind, tide, marine weather, lightning risk, and daylight.
- Rig your primary spinning rod before leaving the ramp.
- Carry spare leader, a few replacement jigheads/hooks, and one backup lure for each presentation you plan to use.
- Put the net, pliers, and measuring device where they can be reached without digging through storage.
- If fishing from a boat or kayak, carry and wear the appropriate safety equipment and PFD.
- Rinse rods, reels, pliers, and reusable tackle with fresh water after the trip and let them dry before storage.
Learn the water before buying more tackle
A good inshore setup should disappear into the background. You should be thinking about current, depth, bait, structure, and how your presentation moves through the water—not whether you brought the 14th rod.
Start with one spinning outfit and learn how the same creek changes from low water to a rising tide, through high tide, and back out on the fall. Watch where bait gathers, where current speeds up, where it slows, and which pieces of structure still have depth at low water.
Those observations will tell you what your next piece of gear should be far better than a generic shopping list.
Use Wave Angler to compare tide stage, wind, marine conditions, and daylight for the area you plan to fish. Then verify current regulations and make the final call from the actual conditions you see at the water.
Disclosure: This post contains affiliate links. Purchases through those links may earn Wave Angler a commission at no extra cost to you. As an Amazon Associate, Wave Angler earns from qualifying purchases.